

Have you ever had a free afternoon with nothing particularly interesting to do? Do you want to upgrade your airsoft gun but can’t afford much more than pocket change to spare? In that case, you’re lucky you’re reading this article, because there are a number of easy mods for AEGs that don’t take much more than a few hours to accomplish but will make a big difference in how your airsoft gun handles. What’s more, doing these modifications is a big help in learning more about how airsoft rifles function and how they can be improved! Start off by learning about some of the best DIY airsoft mods, and if you’ve got the skills to take advantage of a high-performing rifle, you’ll be well ahead of the average weekend airsofter!
Related Articles:
- Interest? Airsoft Guide For Beginners [Brands, Gear, Tech, Tactics,…]
- Learn Your Gun! Airsoft for Firearms Training [Practice, Practice, Practice]
- Learn Something New! Guide to Air-Smithing [It’s Easy]
- This or That? Airsoft vs. Paintball [You Choose!]
- Firepower! Guide to Airsoft FPS [Test Your Limits]
Wrap Your Inner Barrel
If you’ve worked with an airsoft rifle’s internals before, you’ll know that the inner barrel is where the magic really happens: where the pneumatic power from the gearbox’s cylinder is paired with backspin from the hop-up to stabilize every BB that leaves your gun. To encourage higher accuracy, it’s important to ensure the inner barrel isn’t rattling around inside the cosmetic outer barrel, and one way to do that is to wrap it in plumber’s tape, also known as PTFE tape, Teflon tape, or thread seal tape. This not only keeps the fragile, flexible inner barrel snug inside the much stronger outer barrel, it also works to dampen some of the harmonic vibrations of the inner barrel, improving shot-to-shot consistency.
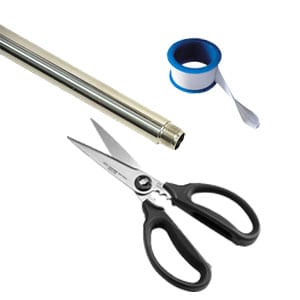 What You’ll Need:
- A pair of scissors
- Plumber’s tape, aka, PTFE, Teflon, or “thread seal” tape
- Your inner barrel or inner barrel assembly, removed from the gun
How to do The Mod:
This is probably the simplest mod in airsoft; it’s easy to find the materials and it’s easy to accomplish without worrying if it might damage your gun. Begin by taking the inner barrel, and wrapping a line of the tape around the barrel’s circumference twice. Since Teflon tape clings to itself, it should stick on pretty well. Make sure you’re holding the barrel taut against the tape so it clings to the barrel, too.
Slowly begin to wind the tape down the barrel in a spiral pattern, continuing to hold it taut so it clings pretty firmly to the barrel. Once you get the spiral near to the hop up unit or where the hop up unit would be installed, do another wrap twice around the circumference. Snip the end and finish wrapping the cut end tightly around the barrel so it won’t come loose. If you took the hop unit off, reinstall it now, and test fit the whole thing where it belongs to the inner barrel. It should slide in with minor resistance. If it slides in loosely, do another wrap the same way, but on the opposite side of the barrel from the first spiral. If it is too tight, try to remove some of the Teflon tape at the top and bottom, leaving one full revolution of tape to keep the whole thing in place.
Seal Your Bucking
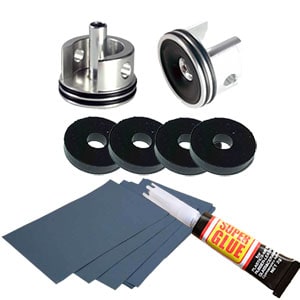
The bucking, or the rubber sleeve inside your hop up that is used to grip the BB and provide backspin, is dollar for dollar the most critical component of any airsoft gun. Sealing the forward-facing end of your bucking tight to prevent air loss is a contentious mod among airsofters. Some say it reduces shot-to-shot FPS deviation by several feet per second, others say it’s unnecessary with a decent hop bucking. I always do it, simply because I see no reason not to. It’s inexpensive and doesn’t require any special sort of skill.
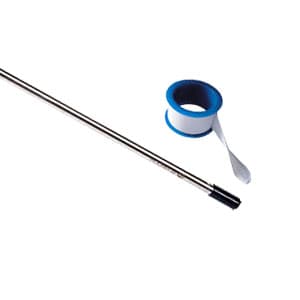 What You’ll Need:
- Either plumber’s tape OR dental floss
- Your inner barrel with hop up unit removed but hop up bucking still attached
How To Do The Mod:
As I mentioned above, you can use either PTFE/Plumber’s/Teflon tape or dental floss. I usually use the tape, simply because I’ve already gotten it out of the barrel wrap mod, but both should suffice. If you’re using the plumber’s tape, this mod is easy as pie. Take the tape and, where the bucking finishes covering the barrel (on the end of the bucking closer to the muzzle), wrap a layer of tape around the barrel and buckings’ circumferences so it covers the gap between barrel and bucking. Do about three layers and make sure it’s tight so it conforms well to that barrel-bucking gap and prevents any air loss.
If you’re doing it with the floss, that’s fine! You’ll need to have nimble fingers, though. Begin by wrapping the floss around the bucking, about a quarter inch (5mm) from the end of the bucking that will face forward in the gun. Pull the floss tight, and tie a simple square knot in the floss to cinch it to the bucking. I’ve included a link to a short article on tying square knots; use the first method here because of the small size of the workpiece.
Congratulations! Now just slide the barrel and bucking back into the hop up unit and reinstall the C-clip that holds the barrel and keeps it from rotating in the hop up unit. The fit into the hop-up may be a little tight, and if it is, try rotating the whole assembly back and forth to help it slide into place.
Shim Your Hop Up Arm
Have you ever noticed your BBs flying unpredictably off to the left or right sides when you fire? The bad news is, that’s one of the most common issues in airsoft and it can make any game difficult. The good news is, it’s often caused by a loose hop up arm and can be fixed easily with only a package of AEG shims (or, if you’re feeling artsy, you can also make your own shims out of very thin sheet metal. I do not recommend this, however).
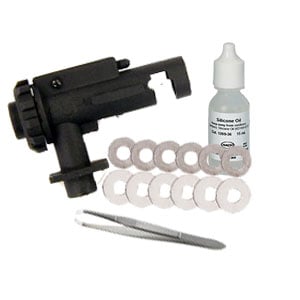 What You’ll Need:
- A set of AEG shims, usually an assortment of 0.2 and 0.1 mm thick
- A complete hop up unit, with the hop up arm, and the pin it rotates on, both removed
- Some form of thicker-than-water rubber-safe lubricant, preferably silicone oil.
- Possibly a pair of tweezers
How To Do The Mod:
Like the above modifications, this one is easy, almost plug-and-play. Make sure you’ve got the hop up arm and the pin it’s on both removed and out on a clean surface. Also, make sure you don’t lose track of the nub (also known as a hop up spacer), the little rubber piece that’s held in place between the bucking and arm by the tip of the arm. Start by dripping a drop of your grease on the arm, to aid adhesion adding one of the thickest shims you have to each side of the hop up arm, around the hole the pin slides through. Hopefully, the grease or oil helps the shims stick to the arm, otherwise, you’ll have to be very careful as you slide the arm back into place with both shims still held against it.
Slide the pin in and check to see if the arm still wobbles and if it can move freely. If it moves freely and still wobbles, continue adding shims symmetrically in pairs, moving from thicker to thinner when it feels appropriate. When you have the appropriate shim installation, you should be able to easily move the arm vertically without much resistance, but it shouldn’t have hardly any side-to-side movement.Be sure to get the nub back in there safely! Even though it seems minor, without it, the hop up arm doesn’t have enough travel to press directly against the bucking, and consequently, your hop up won’t be able to function.
Make a Better “Pen Tube” Hop Up Nub
Depending on how your gun came stock, you may have one of several different types of hop up nubs, also known as hop up spacers, which are the pieces that are held in place by the hop up arm and press directly down on the buckings. The most common stock nub is a small rubber tube, about two-tenths of an inch long and about the same diameter as the ink tube from a standard ballpoint pen- the type that isn’t spring loaded and comes with a cap.
It’s not a coincidence that I mention the diameters are the same. Where the rubber nub, by flexing marginally every time a BB passes under it, saves some wear and tear on the bucking, it’s also pretty poor at maintaining a consistent profile (for obvious reasons) and so it ends up being pretty unimpressive at making sure every BB receives the same amount of backspin. It’s because of this that a rigid nub is a substantial accuracy upgrade over this stock rubber nub, and the best place to acquire a rigid nub of the proper size is out of an ink pen.
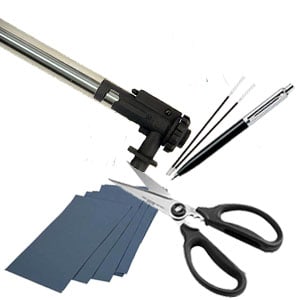 What You’ll Need:
- A full barrel assembly with complete hop up assembly
- Some sort of cutting device (scissors, knife, etc.)
- A single ballpoint pen with the appropriately-sized ink tube
- Sheet of sandpaper, 600-800 grit
How To Do The Mod:
Start by lifting up the hop arm (which you may have already shimmed, as per the last article) and tipping the whole assembly over to let the existing nub fall out. It may not come easily, in which case, a toothpick should be alright for coaxing it out. Once it’s out of there, open up the pen and cut a short section out of the ink tube, a little longer than the stock nub. If it has any ink in it, wash it in soapy water but be careful not to lose it; it’ll disappear very easily!
Follow up by very carefully sanding the nub down to size, making sure you get it so the ends are perpendicular to the sides and the length is just slightly less than the width of the area it needs to slide it into. Once you’ve got that dealt with, slip it back under the hop up arm, close the arm, and look down the barrel. Adjust the hop-up; you should see the shape of the bucking visibly lower into your view down the barrel. If this doesn’t happen, try removing the nub and putting it back under the hop arm, until you see a satisfactory barrel picture upon adjustment. Save the rubber hop nub! They’re not much good for most rifles, but sometimes they’re nice to have for SAW builds and they don’t take up much room besides.
More Related Articles:
- The More You Know! Airsoft History [Learn]
- What’s Different? Types of Airsoft Magazines [Choices!]
- Charge it Up! Guide to Airsoft Lipo Batteries [Information]
- Common Guidelines! Airsoft Safety [Equipment Suggestions]
- Boom! How do Airsoft Grenades Work? [How to Use Them]
Pad the Cylinder Head
Padding the cylinder head sort of rides the line of a “DIY” modification, as it does require a material you may not have around the house: Sorbothane, a high durability rubber. However, Sorbothane pads, even the ones made especially for airsoft, are relatively inexpensive and they’re a great way not just to improve the lifespan of the parts in an airsoft gearbox, but also to reduce gearbox noise and improve the sound signature.
 What You’ll Need:
- The cylinder head from your gearbox, with all other parts, removed
- A Sorbothane pad (I’ll talk more about how to select one)
- Epoxy, gel-type Super Glue, or other similar adhesive
- Relatively fine sandpaper, 400 grit or so
How To Do The Mod:
To start, I’ll go over what a Sorbothane pad (AKA, “sorbopad”) is: it’s a type of durable rubber commonly used for cylinder head padding in airsoft gearboxes. Sorbothane pads for airsoft are sold by their Shore hardness, a material property- there are eleven Shore scales, each ranging from 0-100, and sorbopads are ranked on the 00 scale, which can be described as “slightly soft”. Most often, there are only two hardnesses available of sorbopad, 40 and 70. 70 is advisable for any builds over 380 FPS, 40 for any under.
Due to the difficulty of cutting Sorbothane with household implements, it’s usually sold pre-cut by laser to fit a specific style of gearbox/cylinder head, such as V2/V3, V6, V7, etc. However, you can also buy raw sheets of it, if you so choose. First off, check to see if your cylinder head already has a sorbopad installed. Many manufacturers, even clone brands such as CYMA, have started installing these components as a feature to promote longevity in their AEGs, so you may already have one. If not, go ahead and order one; they’re usually very cheap from most airsoft retailers. Just be sure to buy the correct one for your gearbox!
Installing it is fairly simple: first, scuff the cylinder head a little for better glue adhesion, and then just take the pad and center it on the side of the cylinder head that the piston will contact. Apply a thin film of glue to both the cylinder head and Sorbothane pad, and press them together, again making sure they’re well centered. Hold them together for, if you’re using Super Glue, 30 seconds, or for epoxy, the duration of the set time (hopefully 5 minutes or under). Once that’s done, let set alone for the time recommended by your adhesive of choice. Pull on the pad after to make sure it’s stuck on well enough, then when you’re satisfied with the bond, reinstall into the gun.
If you ever need to remove the sorbopad for any reason, the best method is to break the glue by first putting the whole cylinder head in boiling water, then in an ice bath to cause expansion and contraction. Go through several cycles and see if it can then be peeled off by hand. If not, using a knife to peel the pieces apart is your best bet. This method works better for me with Super Glue than with most epoxies, but results may vary.
Radius Your Gearbox
Have you ever heard of someone cracking their gearbox with a spring that was just too strong for it? Obviously, no one wants that to happen to them; the best way to defend yourself against that is to properly radius your gearbox.
The thing about a 90-degree corner is that it concentrates all the stress from a particular region of that part directly on the corner, making it a prime weak spot in the system. In engineering, particularly structural engineering, there are all sorts of tricks to eliminating these sorts of stress concentrations, and airsoft has adopted one of those tricks: radiusing. To radius your gearbox means to take the two front corners around the cylinder on each half of the gearbox clamshell and grind a small amount of material away, so they’re rounded off and no longer 90-degree corners.
 What You’ll Need:
- Both halves of your gearbox shell, free of grease and with all parts removed (in some gearboxes, the trigger unit can’t be pulled free; don’t worry if this is the case)
- A rotary tool such as a Dremel, cordless drill, or drill press
- A metal grinding bit for your rotary tool, ⅛” or 1/16”
How To Do The Mod:
Radiusing a gearbox is somewhat fiddly and can go wrong if you’re not careful, so it’s important to stay slow for this one. If you feel like you can’t finish the project in one day, it’s much better to take a break and have plenty of time than to try to finish in one afternoon and make an expensive mistake.
Start by setting the gearbox halves down on a table and visualizing what you want your outcome to be. You’ll want to grind away at the front two corners, where the cylinder is visible on a complete gearbox and where its front would meet the gearbox shell, on both halves. Be careful not to go too far; just start at the bottom corner with your tool touching the lower horizontal and front vertical edges and very, very slowly grind in at a 45-degree angle downwards, just until the last part of the corner is ground away and the surface is a perfect curve. If the metal ever starts to get warm, take a short break to avoid overheating your grinder.
Do the same sort of grinding operation with the front top corner(but flipped), then do again on the other gearbox half. There should be no sharp corners at the cutout where the cylinder assembly meets the gearbox shell. If you don’t feel comfortable with these textual instructions, I encourage you to watch several videos on the topic as well!
Port the Cylinder
In airsoft, it’s often wise to perform an operation known as “cylinder volume matching”. Effectively, the goal is to approximately even out the amount of air that is contained in the piston cylinder and the amount of air needed to fill the entire barrel, and it’s done by adding a hole to the side of the cylinder. This is to allow air to flow freely out of the side of the cylinder and to allow the piston to move more freely up until the point where it passes the hole. This has several benefits. By allowing the piston to move more freely at the beginning of its cycle, it builds up more momentum before it begins to compress the air that launches the BB. This means higher initial pressures in the barrel and consequently higher FPS for the same gearing and spring power. Also, by matching the barrel-cylinder volumes, less air is “wasted” at the end of the cycle after the BB leaves the barrel. Not only does this reduce the sound signature at the muzzle, it also means the piston impacts the cylinder head at a lower velocity than it would otherwise due to the lack of resistance at the end of its cycle.
 What You’ll Need:
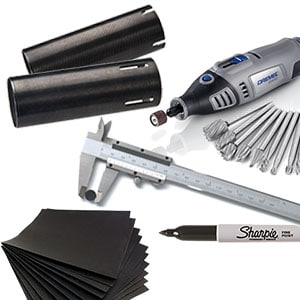
- An airsoft cylinder
- Cordless drill or drill press
- Drill bit or grinding bit, ¼” diameter
- Ruler or set of calipers
- Sharpie marker or similar
- Sandpaper, 400, 600, 800, and 1200 grit (can get by with just 400 and 600)
How To Do The Mod:
Generally, the rule of thumb for porting a cylinder is to leave about 1.2-1.4 times the volume in the cylinder as is in the barrel. Since both barrel and cylinder cross-sections are circular, it’s pretty easy to calculate where the port should be drilled. Assuming a 6.08mm barrel (the diameter of most stock barrels) and 23.5mm cylinder (Tokyo Marui specification V2 cylinder), the equation for volume matching should look like the below:
(1.2)(6.082)2(Length of Barrel) =(23.52)2(Length of Cylinder) Or (Length of Barrel)(.080325) =(Length of Cylinder)
Take your cylinder and see how deep inside the cylinder head goes; mark this on the outside, then calculate based on your barrel length how long you want the useful volume in your cylinder to be. Use a measuring tool to measure from the cylinder head mark back and mark the second point. If you’re feeling lazy, I’ve included a link to a handy chart for cylinder volumes of common barrel-length rifles.
Now, set the cylinder so the front side (the side you marked the cylinder head on) is facing left and get your drill. Prepare to drill/grind a hole to the right of the second mark you just made, so the very left edge of your drill bit just grazes the right side of that mark. Drill through, patiently. Take breaks if your bit gets warm.
Once you’ve drilled through, check the inside of the cylinder. Any sharp bits of metal need to be pulled off. Then, use the sandpaper you have to smooth down the inside of the cylinder around the hole you just made. Any sharp edges will absolutely shred the o-ring on the piston head every time it passes over it, so be careful to get all the sharp bits out!
Piston Half Tooth Removal
Much like the addition of the Sorbothane pad, this is a modification that many manufacturers now add to their stock guns for increased reliability. If nothing else, that should be an indicator that it’s common and fairly harmless practice!
Effectively, most airsoft pistons have eleven teeth and one “engagement tooth”, which is at the back and is substantially bulkier than the other standard teeth to take the additional spring load when the sector gear first contacts it. The tooth immediately in front of the engagement tooth may in some cases make it difficult for the sector gear and engagement tooth to properly interact, so long as it’s left as a full-length tooth, hence, a common airsoft modification is to file it down so the piston rack and sector gear mesh predictably and reliably in all conditions.
 What You’ll Need:
- A high-carbon rat-tail file or similar
- The piston from your gearbox, including the “rack”, which is the set of linear gear teeth on the piston.
How To Do The Mod:
This modification is both very simple and somewhat time-consuming. First, make sure you’ve got the piston set up securely on a good workspace (using a clamp is good, if at all possible). Then, use your file to slowly but surely work the second-to-last tooth, the one immediately before the beefed-up engagement tooth, down until it’s about half the height of the other teeth. Don’t round it over; it will work just fine squared off. This is time-consuming because most steels used in airsoft racks are reasonably high-carbon and thus hard, and on high-end piston sets, often the steels are also pretty well heat-treated.
One thing that you ought to be very careful about is the metal shavings that come off the piston rack. Metal shavings are an excellent abrasive, which is to say, they’re terrible for gearboxes, particularly because the gearbox shell is largely aluminum and oftentimes, so are the bearings that the gears ride on. Cleaning all sorts of metal dust and shavings out of a gearbox after a modification like this is a must, but especially so if you’re working with hard metals like steel.
Top DIY Mods Final Thoughts
You certainly don’t need to be rich to enjoy airsoft; it’s a sport for everyone! From surplus gear to Crye Precision kit, from a CYMA 028 rifle up through Umbrella Armory custom guns, if you have a little money to put into airsoft as a hobby, you’re sure to find some enjoyment in the game! And as you got the chance to see above, it’s a sport that rewards getting your hands dirty and learning about the insides of the gearbox and hop up, whether or not you have access to expensive parts or fancy machine tools. Who knows, you might end up enjoying building your guns more than playing with them! But in either case, learning all about the easy, quick DIY afternoon mods that you can throw into your AEGs is a worthwhile pursuit and it’ll pay dividends by putting a more reliable, more accurate gun in your hands. Thank you for visiting iamairsoft.com! For great products and more information about the game, check out our Airsoft Buyers Guides and Airsoft U!
Even More Related Articles:
- This or That? Airsoft vs. BBSs [Know the Difference]
- It’s All Important! Airsoft BB Weight [Everything BBs]
- Enhance Your Experience! CO2 vs Green Gas [Get blowback…]
- Question: Does Airsoft Hurt? Airsoft vs Paintball Pain [Ouch!]
- Did That Bush Move? BDU vs. ACU [The Differences Explained]
- Airsoft Laws: Are Airsoft Guns Legal in Your State?

Noah Mains is a writer, an airsofter, and most importantly, he’s stuck in the 80s. From Colt SMGs to David Bowie to brick phones, he has an acute appreciation for the greatest decade, and is more than happy to share his enthusiasm for the ALICE gear system (the superior loadout, of course) with anyone who’ll listen.